

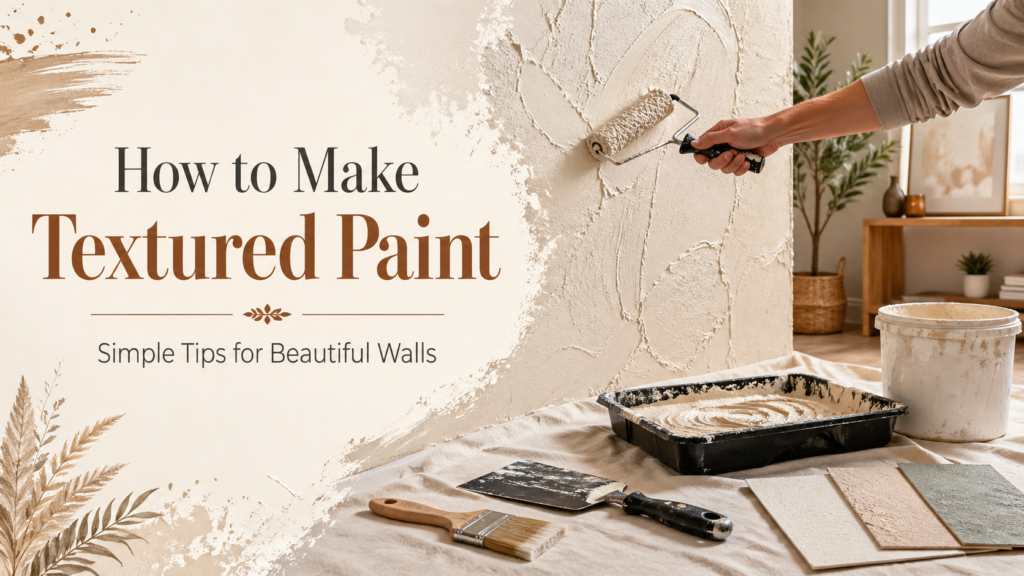
How to Make Textured Paint: A Creative Guide for Unique Walls
How to make textured paint is a fantastic way to enhance your walls, adding depth, character, and a visually unique touch. Whether you’re redecorating a room or simply want to add an artistic flair to your living space, textured paint offers an affordable yet artistic solution. In this guide, we will explore how to create textured paint at home, the various techniques you can use, and the best way to apply it for a stunning finish.
What is Textured Paint?
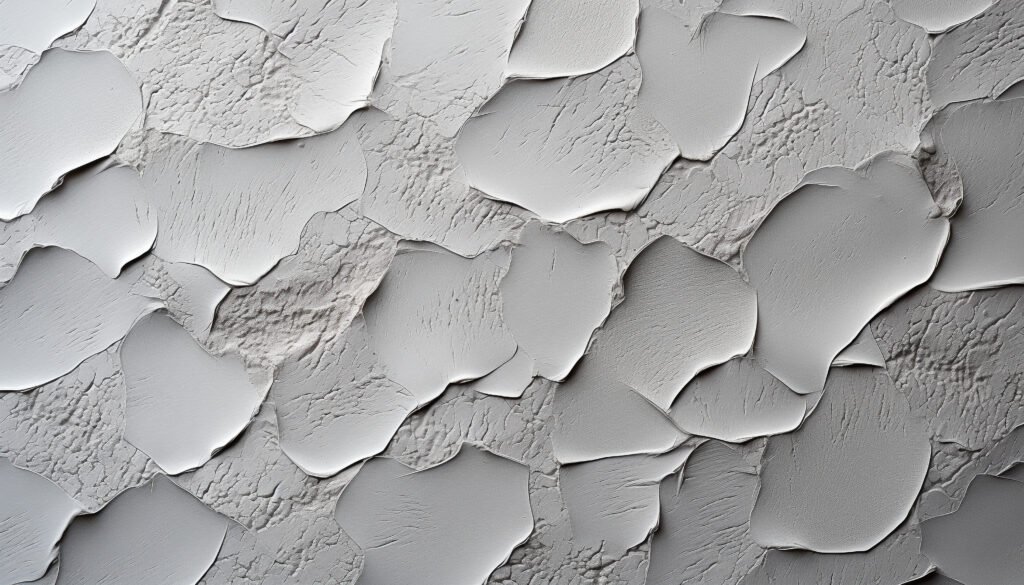
Textured paint is a specially developed paint which provides a three-dimensional raised appearance on a surface. Textured paint is a contrast to regular flat paint, which leaves a smooth and uniform surface on your walls. This type of paint can be used to enhance a room’s aesthetic, mask imperfections, and even create a more durable surface.
Textured paint can be applied in several different ways, and the technique you use will depend on the appearance you are trying to accomplish. Certain textured paints resemble the appearance of natural substances such as stone, whereas others have a more artistic and abstract appearance. No matter what you envision, creating textured paint is a DIY project that is entertaining to create and can change any room.
Materials you will need.
We will only get into the step-by-step process of making the textured paint; first of all, have all the materials that you will require to make the paint texture. The following are some of the things that will be useful in your DIY project:
Latex or Acrylic Paint: Select a base color of paint to use in your textured paint.
Joint Compound or Plaster of Paris: These materials will be used to add thickness and texture to the paint.
Paint Mixing Tools: To mix your paint and texture ingredients, use a mixing stick or a power mixer.
Sponges, Brushes or Rollers: To apply your textured paint to the surface.
Drop Cloths: Keep your floors and furniture out of the way of paint splatters.
Tape used by Painter: To make an even edge around trims and baseboards.
Putty Knife or Trowel: To apply heavier layers.
Make a textured paint step by step.
Step-by-Step Guide to Making Textured Paint:
Step 1: Prepare Your Surface
It is imperative to prepare the surface on which you will work before you begin making the textured paint. When painting over another paint or drywall, be sure you have a clean and dust-free surface. In case of any flaws, such as cracks or holes in the wall, apply joint compound to cover the flaws. After repairing any holes, be sure to leave the wall to dry thoroughly.
Painters use painter’s tape to cover any section that you do not wish to paint, like trim or baseboards.
Step 2: Your Textured Paint is Mixed.
To create textured paint, you’ll need to mix a base color of latex or acrylic paint with a texturing agent. Joint compound or Plaster of Paris are the most commonly used texturing agent.
- To achieve a smooth texture: 1 part joint compound with 4 parts paint. This will create a soft, light texture that’s easy to apply.
- To make a stronger texture: Combine an equal amount of joint compound with paint. This will provide you with a more dramatic, bumpy finish.
Take your paint, add the texturing agent and mix with a paint mixing stick or power mixer. The consistency should be thick, but still spreadable. When the mixture seems thick, you can add some water so that you may get the desired consistency.
Step 3: Coat with Textured paint.
And, now, the fun begins–to apply your textured paint! How you work your paint would be based on the kind of texture you want to achieve. The paint can be applied using many tools, including sponges, brushes, or rollers.
- Sponges: To be a little more organic and stone-like, use a sponge to dip into your textured paint mixture and lightly dab it onto the wall. The sponge will form a stippled and rough finish.
- Brushes: To make it more organized, you can paint it with the help of a stiff-bristled brush in vertical or circular strokes. This will provide you with a little raised, brushed texture.
- Rollers: To achieve a smooth, yet rough appearance, apply a textured roller to roll the paint on the wall. It is a simple way of getting to areas that are vast areas.
Begin to apply the textured paint at the top of the wall and work down. Don’t forget to overlap your lines to have a smooth finish. Depending on the amount of texture you want, you may need to apply a few coats of textured paint.
Step 4: Polish up the Texture (Optional)
In case you like a smooth texture, then you can apply a trowel or putty knife to smooth the raised part when the paint is dry to your taste. It is an ideal method of giving a smooth, polished appearance, yet with depth and interest.
Step 5: Let the Paint Dry
Once you have put on your textured paint, leave the paint to dry. This may take a few hours to a day, depending on the thickness of your texture and the type of paint you used. When the paint has cured, wipe away any painter’s tape and put a dab of paint where the additional texture is needed.
Different Techniques for Textured Wall Paint Painting
Although a simple procedure of creating a textured paint is not hard, this paint can be used in numerous creative ways in order to bring some unusual effects. The following are some of the common ways of painting textured wall paint:
- Brushed Pearl Finish: You would put on a light base coat of paint with a brush and then use a brush to apply a pearlscent textured finish on top. This forms a glamorous, shining appearance on the wall.
- Stucco Finish: Add sand to your paint mixture to achieve a rough, stucco finish and a Mediterranean or rustic appearance.
- Sponging: Take a second layer of paint in a new color with the use of a sponge. This will make your wall look soft, layered and depthful.
- Rag Rolling: This is the same as sponging except that a rag is used. It is a more even roll-like finish to provide a polished appearance.
Tips for Applying Textured Paint
- Test Your Mixture: Before the textured paint is applied to the wall, it should be tested on a small section to make sure that the texture is as desired.
- Apply Multi Colors: Use more colors of paint to have a more dynamic and colorful textured wall.
- Think about Lighting: Textured walls can shadow, so think about how the light in your room will impact the appearance of your painted surface.
- Seal the Wall: Once the textured paint is dry, seal it with a clear layer to preserve the finish and make sure it will last.
Benefits of Using Textured Paint
- Adds Dimension: Repulsive paint may make a flat wall that is very dull into a dynamic centre of the room.
- Conceal Flaws: Walls with texture can be used to conceal cracks, holes, or rough walls that can be very hard to fix.
- Individualized: Under textured painting, you can come up with any form of diversion, including faint adornments to bold textures that are bold.
- Inexpensive: Textured paint can help you create the same effects without spending a lot of money on textured wallpapers or other textured materials.
Conclusion
Creating textured paint is an excellent idea to have your home creatively repainted without stretching your budget. Using the steps above, you can easily develop beautiful textured wall paint painting which can add depth and character to your walls. Textured paint has unlimited potential in home improvement and expression of personal taste, whether you want a smooth, subtle texture or a bold, dramatic finish.
So go ahead and get your supplies and begin testing some of the various methods of texturing today. In a short time, you will have a beautiful and textured wall which will leave everyone walking through your door amazed.